Friday, November 2, 2018

How to play youtube on background for Android and ios

Hi all,

This used to be very easy on both Android and IOS before youtube decided to release youtube red. Luckily there is a workaround.

It is pretty much same for both android and ios. 1. You need to use chrome.
2. Request desktop mode
3. Start your video
4. Go to your home screen
5. Your video will pause slide to audio options and resum
6. Thats all enjoy!

Credit to linked video:

https://www.youtube.com/watch?v=wr7Gy7VINB8&app=desktop

Saturday, December 9, 2017

How to Create a Bootable Install Drive for macOS High Sierra How to make a macOS High Sierra USB boot installer drive
Some Mac uses like to create a bootable USB installer drive for macOS High Sierra. A bootable install volume of macOS 10.13 allows users to perform a variety of tasks including formatting and clean installs, updating multiple Macs from the same USB flash drive installer (and without re downloading), and to use as a troubleshooting boot drive should the need arise, amongst other benefits for advanced and more technical users. 
This walkthrough will detail how to make a bootable USB install drive for macOS High Sierra. 

Requirements to Create a macOS High Sierra Bootable USB Installer

To create a functioning macOS High Sierra installer boot drive, you will need the following:

  • A Mac with access to the App Store

Beyond that you’ll just need a bit of patience and a bit of technical know-how or comfort following technical instructions. Making a USB install drive requires the usage of precise syntax at the command line with superuser privileges, using the wrong syntax could lead to unintended data loss.

How to Make a Bootable USB Installer for macOS High Sierra

  1. Connect the USB flash drive to the Mac, if you need to format it go ahead and do so
  2. Download macOS High Sierra installer application from the App Store* and be sure the complete installer is located in the /Applications/ directory 
  3. When the installer has completed downloading, it will automatically launch – quit out of the installer when this occurs
  4. Open the “Terminal” application found in /Applications/Utilities/ directory on the Mac
  5. Enter the following command syntax at the command line, replacing “UNTITLED” with your USB drive name if necessary:
  6. sudo /Applications/Install\ macOS\ High\ Sierra.app/Contents/Resources/createinstallmedia --volume /Volumes/UNTITLED && say Boot Installer Complete
  7. Confirm the syntax is exactly as written, then hit the RETURN key and enter the administrator password to start making the High Sierra installer drive *
  8. command syntax to create macOS High Sierra boot installer
  9. Let the installer complete, when finished you will be informed that the process has completed
Once you have created the USB boot installer drive for macOS High Sierra, you can either launch it immediately to install macOS High Sierra on the current Mac, reboot and startup from the USB installer drive, or eject it and use it on another Mac. 
* Note: if you are getting a “command not found” error and you are certain your syntax is correct, be sure to check the file size of the “Install macOS High Sierra.app” as found in the /Applications folder. If the file size of the High Sierra installer is not over 5GB then you have the incomplete installer and will need to download the complete macOS High Sierra installer application as described here in order to create a bootable installer drive.

Booting from the macOS High Sierra USB Installer Drive

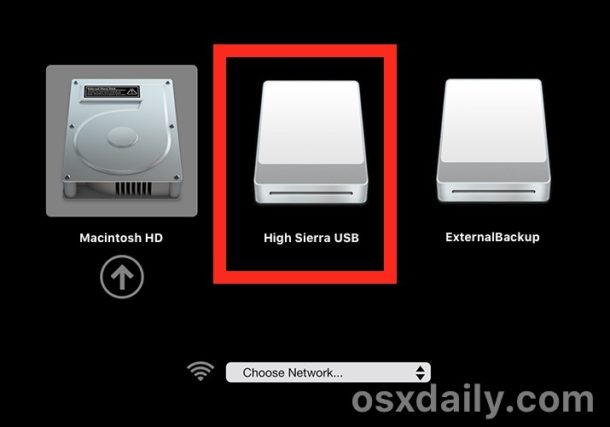
With the newly created macOS High Sierra USB installer drive connected to the Mac, reboot the computer. Immediately on reboot, start holding down the “OPTION” (ALT) key to load the boot menu. Select the High Sierra installer at this screen.
Choosing the macOS High Sierra boot installer
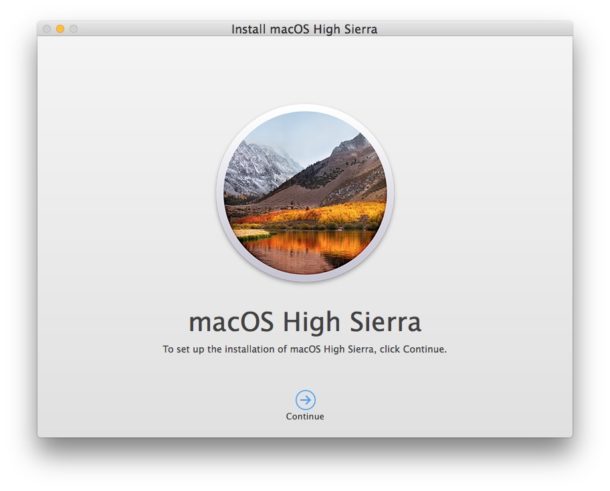
Once booted from the USB drive you can proceed with installing macOS High Sierra, using the Disk Utility tools to format or erase a volume, work with Time Machine, and other similar tasks.
MacOS High Sierra installer
If you had previously created a boot installer for the High Sierra beta you may notice the syntax is different for createinstallmedia is different with the final version, part of that is to accommodate the new file name of the application installer, and the remainder removes the necessity of the –applicationpath flag and directive. 
Keep in mind that macOS High Sierra can only be installed onto supported hardware, if you’re uncertain whether or not a particular computer supports the release you can check this list of macOS High Sierra compatible Macs.
Do you know of another approach to making a macOS High Sierra bootable install drive? Do you have an easier method, or do you have any particular tricks related to this process? Let us know in the comments.

Source: http://osxdaily.com/2017/09/27/create-macos-high-sierra-bootable-installer-usb/

Thursday, November 30, 2017

How to delete a file immediately in OS X

This was a feature I was looking for a long time. Anybody coming to OS X from windows misses shift+del option. Now we have it in OS X as well. Starting from El Capitan (10.11) you can do alt+command+delete (⌥+⌘+delete) to immediately delete something. Moreover individual deletion option came to trash can. Good work Apple keep doing it!

Sunday, October 30, 2016

Auto-hide dock with a keyboard shortcut

I like mac os dock, but sometimes when I need more of my screen I hide it. Before (I don't know up to which version exactly) one can change dock properties directly from apple icon on top left. Not anymore :(. Now to do that you need to open System preferences, select dock and select or unselect "Automatically hide and show the Dock". As you can see it is a lot of steps. Luckily there is a shortcut for that and it is command+option+D.

Saturday, June 11, 2016

Unit Converter

Proselytum

Unit Converter

Hello World!

Wednesday, March 23, 2016

How To Crop Multiple Images on Photoshop (at once)

Hi all, I have another post for you which works on both mac and windows if you have Photoshop. Have you ever needed to re-size, crop, change color or do anything on mac to a folder of pictures. I do. And it is for 1000 pictures so making it one by one is a tedious work. So I searched online and find this method. It is automate option on photoshop and you use it with anything.

Here are the steps,

1. Create two folders one for images to be cropped (input) and one for output.
2. Open one image on input folder with photoshop.
3. On windows tab select "actions"
4. From actions window click new action button
5. Name your action and it will start recording. Do your formatting what ever it is. Save your modified image using save as button to your target folder and select output parameters before stopping record.
6. Once you successfully save the modified image, click stop and go to File>Automate>Batch

7. Select input and output folders and don't forge to select override action "Save As" command button.

8. Enjoy :)


Saturday, January 23, 2016

How to enable chrome extensions to run in incognito mode

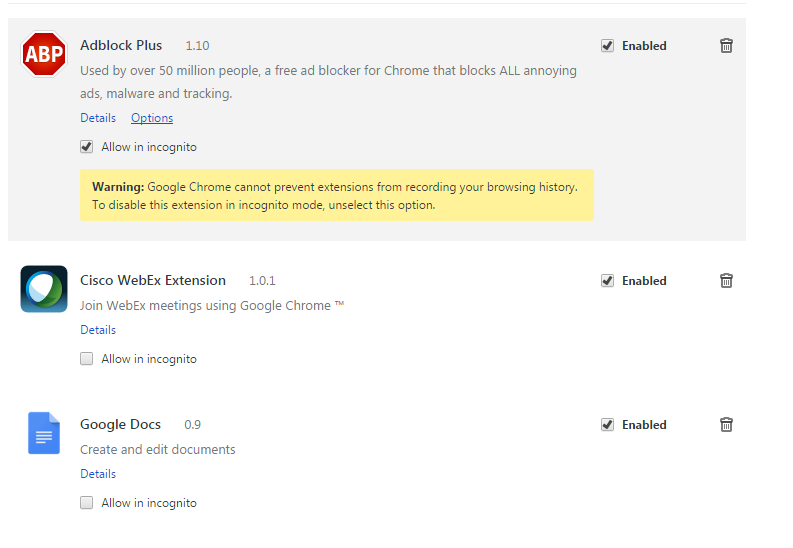
Did you realize your carefully curated google chrome extensions are not working in incognito mode? Yes I am looking at you AdBlock Plus :) This is because they are disabled by default but it is possible to enable them to work under incognito mode. Of course google disclaims it can send information to that extension server so it may not be 100% incognito anymore. By the way this method holds both for osx and windows/

Here are the steps to enable extensions to run in incognito mode.

1. Go to chrome://extensions/
2. You will find a radio box under each extension saying "Allow in incognito", select it for the ones you want
3. Enjoy.


It is that easy. I wonder why it took me so long to find this. Hopefully you found it much soon after you realized/wanted it.


export video transcript

YouTube Transcript Exporter YouTube Transcript Exporter Enter a YouTube video ID to fetch its transcript. Export Tra...